Preparing for a roof inspection is one of the smartest things a homeowner can do to protect their investment. Whether you’re preparing for a routine maintenance check, buying or selling your home, or suspecting damage after a storm, thorough roof inspection preparation is essential. At FM Roofing, we know that the better you prepare, the more accurate and efficient the inspection will be.
Why Roof Inspection Preparation Matters
Roof inspection preparation helps inspectors assess the condition of your roof without unnecessary delays. A clean, accessible, and organized property lets professionals focus on spotting issues rather than dealing with avoidable obstacles. If your roof inspection preparation is done well, you’ll get a clearer, more useful report—and possibly avoid costly surprises later. Stay updated—join us on Facebook.
1. Identify Your Inspection Goals
Clarify the primary purpose of the visit before the inspector arrives. Are you documenting storm damage for an insurance claim, ensuring your home is ready for a harsh Wisconsin winter, or providing peace of mind for a potential home buyer? Defining your goals helps the inspector prioritize specific areas, such as checking the integrity of the flashing or looking for subtle shingle lift. Knowing the “why” behind the inspection allows for a more tailored and useful final report.
2. Clear the Perimeter of your home.
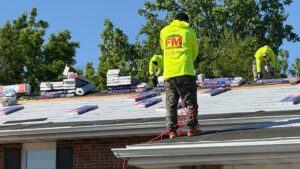
Inspectors need unobstructed access to your exterior walls and roofline to set up ladders safely. A key part of preparation is moving any objects that might block their path or pose a tripping hazard. This includes moving patio furniture, grills, potted plants, and children’s toys away from the drip line of the roof. Additionally, ensure that overhanging tree branches are trimmed back if they obstruct the view of the shingles. Keeping pets and children indoors during the process also ensures everyone’s safety.
3. Clean Out Gutters and Downspouts
Clogged gutters are more than just a nuisance; they can hide serious structural issues like wood rot, mold, or ice damming. By cleaning out leaves and debris beforehand, you provide the inspector with an unobstructed view of the eaves and the drainage system. An inspector needs to see if water is flowing correctly or if there are signs of “granule loss” (the sandy coating on shingles) collecting in the troughs—a primary indicator that your roof is nearing the end of its lifespan.
4. Document Known Issues and “Red Flags”
You know your home better than anyone else. Before the appointment, take a walk through your house and note any “red flags” you’ve observed. This includes water stains on ceilings, bubbling paint, damp smells, or drafts near the attic. Making a list of these issues guides the inspector’s focus to specific areas that might require a deeper look. If you noticed a leak during a specific heavy downpour, sharing that detail can help the professional pinpoint the exact entry point of the water.
5. Ensure Easy Access to the Roof and Attic
Time is often wasted searching for keys or moving heavy boxes. Ensure that all gates are unlocked and that the attic hatch is easily accessible. If your attic is located in a closet, move clothes or storage bins out of the way so the inspector can get inside without struggle. Many critical roofing failures—such as poor ventilation or hidden leaks—are only visible from the inside, making attic access perhaps the most important part of the entire process.
6. Set the Stage in the Attic Space
An attic shouldn’t just be accessible; it needs to be “navigable.” If your attic is packed with holiday decorations or old furniture, try to clear a path to the areas directly under the roof peaks and valleys. Additionally, ensure there is adequate lighting. If your attic doesn’t have a built-in light fixture, providing a high-powered flashlight or a temporary work light allows the inspector to spot subtle signs of mold, moisture, or daylight peeking through the boards.
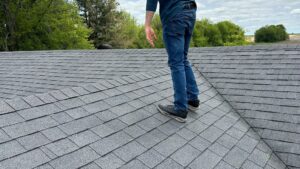
7. Secure Loose Rooftop Fixtures
If you have temporary fixtures like satellite dishes, solar walkway lights, or seasonal decorations, ensure they are stable and out of the way. Loose cables or unstable equipment can be a safety hazard for someone navigating a steep roof pitch. A clear, stable surface allows the inspector to move confidently and focus entirely on the condition of the roofing materials rather than dodging obstacles.
8. Compile Your Roof’s History and Paperwork
In the realm of roofing, context is crucial. If you have past inspection reports, receipts for minor repairs, or the original warranty information for your shingles, have them ready to share. This historical data helps the inspector determine if a current issue is a recurring problem or a new development. It also helps in estimating the remaining life of the roof by verifying the age and brand of the materials used.
9. Prepare for Wisconsin’s Unique Climate
Homeowners in the Midwest face specific challenges. If your inspection is taking place during the winter months, be sure to shovel paths and salt walkways so the inspector can safely position their ladder on solid, non-slip ground. During the autumn, clearing heavy leaffall is essential to seeing the flashes. Furthermore, be vigilant for signs of local wildlife; squirrels or birds nesting in soffits or under eaves can cause significant damage that warrants the inspector’s attention.
10. Open the Lines of Communication
Finally, treat the inspection as a collaborative process. Don’t be afraid to ask questions about the materials, the estimated timeline for replacement, or maintenance tips to extend the roof’s life. Clear communication ensures that you understand the findings and that the inspector understands your concerns.
Conclusion: Preparation Pays Off
Thorough roof inspection preparation gives you a better inspection result, minimizes delays, and can potentially save you money. Whether it’s your first time scheduling an inspection or part of your routine maintenance, following these steps ensures a smooth and informative process.
At FM Roofing, we’re here to help homeowners with all aspects of roof inspection preparation. Contact us today to schedule your inspection or ask questions about your property’s roofing needs.